
Hi I’m sorry today I’m gonna teach you how to do heads done today we’re going to learn how to do paschimottan Asana or a forward fold yesterday I’m going to be teaching you how to transition from chair pose through to a forward fold and back again then we’re going to learn how to do paschimottan Asana or a forward fold. And this is really brilliant for stretching out your hamstrings such that we’re going to take our legs out in front of us I remove the flesh underneath the bottom now you might find that in your in this position that you should have and up like this with a rounded back and kind of not really able to sit forwards shoulders start to hunch up a little bit, if this is the case it just nothing to worry about just meet the hamstrings a little bit tight in which case I’d recommend either sitting on a yoga block or, if you don’t have one of those just grab a nice big book pop underneath your bottom and sit on the edge of it. And this just acts to tilt the pelvis forwards. So you can then sit up really really nice and tool that stops your rounding up through the back so either remaining on your block or, if you’re not using the block there removing the flesh from underneath here sit up nice and tall I do know that your toes happen to be a little bit far away for you which mine definitely wear when I started are useful to grab your yoga belt or as I’ve got here just the dressing-gown thought I’m just gonna pop that around the end of your feet and have the ends of it ready for them to come into position. So we’re gonna sit up nice and tall then we’re gonna inhale the hands up high to the sky exhale as you draw the belly in.
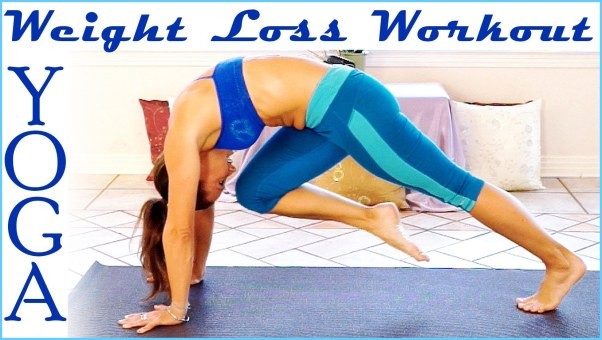
Yoga For Beginners 7 Simple Beginner Yoga post Exercises Photo Gallery


And you can start to fold forwards now actually do this it’s really important that the hinge is gonna come from your hips so what you see most people doing here is this you’re trying to get your head down like this. So you end up rounding cruder back scratching up your shoulders and being in a really uncomfortable position what you actually want to achieve is the hinge here at the hips. So you’re literally folding in half. So you lead forwards with the chest drawing improve about in keeping the spine really long as you can see the first thing to come down is my tummy then my chest. And then my head grab on to the end of the feet perhaps hold toes. And then we get it inhale and lengthen where you legs about through spider in through the belly even more of an exhale fold forward breathing here before however, if you could get your toes. So this is when you’re gonna grab the strap. So Inhale hands up high exhale take hold of your strap. And then again you’re gonna inhale sit up nice and tall exhales you start to walk your hands down the strap perhaps you’re just gonna breathe here oh my got your head in line with your spine looking towards your big toes making sure you keep your feet active at all times again breathing here v belly draws in for chest reaches forwards free really using every exhale to fold a little bit deeper so every inhale creates a little bit more length so sit up even more every exhale folds you just a little bit further now when you’ve done your five breaths again we’re gonna inhale look up lengthen then exhale release your grip.
So that’s how you do a basic forward fold or paschimottan Asana we’ll just show you now one time through again so again hailing hands high exhale fold forwards perhaps grabbing the big toes the outsides of your feet or your strap. And then inhale look up lengthen exhale fold forwards further leading with the chest sign is learn when reading here apply a little bit more space touching the class two and one inhale lengthen exhale reach so now I’m going to show you how we get into that proving us and starting from Sun Salutation eight. So, if you just pop your props to one side for a moment. And then we’re going to come up to stand again you’re gonna start your front of your mat toes together heels together your hands higher up towards the sky exhale thought school was drawing in through the body inhale look up lengthen exhale step or jump back to high plank position either drop the knees or chaturanga up dog or low Cobra I’m kind of all the way back to downward facing dog now from here to come through to seat it you’ve got a couple of options one is that you’re going to step into seated or two that you’re going to jump so to step in you’re gonna bend the knees look towards your hands. And then step into a cross-legged position just as you would, if you’re sitting down of course I did cross the ankles. And then roll over the ankles come onto your bottom take your legs out in front of you ready to start your forward fold you’re gonna jump into the position the same thing downward facing dog then the knees look forward towards the hands nice legs. And then take the legs out in front of you and again to remove the flesh run to the bottom inhale hands high exhale hold your strap with your feet inhale look up lengthen exhale / both breathing get free to the one inhale look up lengthen exhale bring use your breath you can either then move here on to another position or, if you’re coming true vinyasa you’re gonna cross your legs roll over the ankles come on to your hands.
And then you can step or jump back to high plank I need to drop the knees or chaturanga up dog or low Cobra and all the way back downward facing dog thank you so much for joining me today to learn forward fold or paschimottan Asana I hope you enjoyed it, if you’d like to comment below please do and thanks to those of you who already have today I’m going to teach you how to do headstand headstand is one of the basic inversions that we do in yoga and is really really good for getting all the student to the brain. And also make you feel very energized after you’ve practiced it however it’s very important that you practice this correctly and although it’s called heads tack you should actually have with substantial amount of the weight on your forearms rather than on your head, if done incorrectly headstand can cause compression through the spine. So It’s really really important that you learn in the way that I’m going to teach you and build the core strength. And the arm strength is essential for this before actually coming up into headstand so to learn our headstand there are multiple types of heads down. But we’re going to take traditional headstand where you interlace the fingers and make a base like this you may have also seen other headstand practices where you come down and put your head down this is called tripod tripod headstand. But we’re not going to learn that one for today. So you know just come into our headstand we first of all want to measure out how far apart your arms are going to be in this position the traditional way of doing this is to hold on to the elbows and use that as a measurement distance however there is much research today that shows that this is perhaps not the best way and although you can do it this way I prefer to kind of look at my shoulders. And then down to my elbows and see where shoulder width apart is and everybody is in different proportions you’re then going to interlace your hands like so and place your hands on the back of your head so again this can be quite confusing where you’re gonna put your hands maybe here here here I like for women to think of where you would tie your ponytail generally or just where the back of the head start to curve. So you’re gonna place your hands back here before we actually come down. And you want your hands to completely support the back of your head here so they’re not going to resting on your hands. But just, if it acts as a support so placing the elbows down shoulder-width apart we then interlace the hands and place the hands on the back of the head where it starts the curve you’re then going to place your head down onto the floor in the game it’s important to get the placement of the head right you don’t want to be on the back of the head, if you also don’t want to be on your forehead you want to ensure that the next day is nice and long. So I’ll just show you how it would be done incorrectly.
So this would be wrong where my chin is actually touching my chest and my neck is all scrunched up this would also be wrong where the back of my head is almost on my back. And the neck is all scrunched up the other way what we want to achieve is a nice long neck where there’s no compression through the spine here from here we’re going to tuck our toes just like you’re gonna come into downward dog. And come into a downward dog on our head. So you might feel here you’ve got quite a lot of pressure on the head, if that’s the case what I’d really like you to do is press through your forearms okay really really lifting up. So that you can actually lift your head up off of the ground, if you want it to. So I’ll show you this here in your downward dog. And then you can actually lift your head up out of your hands completely. So that is how much you should be engaging through the upper arms. And also through the core to allow the head to lift up now of course when we do the heads down with our X you can keep it down on the mat. But I just want you to get that a feeling of how much the arms. And the core are working to stabilize yourself here so from here come back into your downward dog perhaps just play with breathing here, if this still feels like you’ve gotta wait a lot of weight on the head then for today I would just like you to stay here and work on lifting the head up and popping it back down on the mat the next stage, if you start to feel comfortable here it’s the bend one knee just bring it in tap your chest. And then bend the other knee tap the chest do this a few times just getting used to the feeling of lifting the feet up off of the floor and then, if you want to progress further you’re gonna start to walk your feet up towards your head as much as you can now the further up that you can get your feet towards your face the easier this is going to become for you to come up into the full headstand.
So, if your feet are all the way back here then as you can see I put an awfully long way to go up to come into headstand, if I lift a leg how am I gonna get up however. But I walk my feet up further I can actually get my hips over the top of my shoulders. And then I can lift one foot and literally just start to use the balance to lift my toe up off of the floor. But to do this you need to be quite flexible so don’t worry, if that’s not where you are today, if that’s not the case for you we’re just going to tuck the toes look up as far as you can engage your core and start to bend one knee again bend the other knee. And then try to take both knees in to the chest now I just want you to stay here in this little wall maybe doing a few things like taking the legs out white you can kick the feet a little bit to come back down. And this is what I’d like to call own in your headstand okay so when you’re a really stable in that position it means that you are using your core enough, if you’re ready to come all the way up into the full headstand, if you’re wobbling in that position it means you’re not strong enough to come all the way up. And you’re using momentum by kicking up which is where you’re going to injure yourself so to come into the full pose we’re gonna interlace the hands again measure out the distance come into our down dog walk the feet up then the knees in. And then slowly start to use your core to unravel coming all the way up to balance here for 10 to 15 breaths when you’ve done that you’re gonna come out the same way you came in into a ball and all the way back down onto the mat okay. So this might take you a week it might take you a year might take you several years to accomplish.
But don’t worry about it just keep practicing and while you are at the stage remember always to be by wall. So It’s important when you’re learning headstand to the all of this practice although I haven’t got a wall here you’re against a wall. So you’re the back of your head in your back of facing the wall. And you just imagine this is your wall here head down. And then do the practices as I’ve just demonstrated however when you’re starting to balance. And you can balance by the way the next step is obviously to come to the middle of the room it’s coming to your headstand. And the way to get out of it is to come into a forward roll. So you see people come up. And then just go straight the way over. And you can really hurt your back so when you feel like this start to fall what I want you to do is tap into a ball tuck your chin. And then you’ll roll out nice and gently. And you work into yourself thank you so much for reading today I hope you enjoyed learning headstand and thank you to those of you who have commented below please do comment more, if you’d like to today we’re going to talk about tripod headstand in one of my previous posts we’d have normal headstand well you take the hands on the back of the head you place the forearms down on a mat this one’s slightly different. Because we’re gonna have the head down on the mat still we’re gonna have the hands in a position like this. So that elbows are a 90 degree angle very similar to in crow pose so to start preparation for our tripod headstand we’re gonna come down onto the mat. And you’re gonna place your head down onto the mat.
So that you get into the middle of the head about here century yoga mat from there you’re going to make sure that your hands are further enough back. So that you can create this nice degree angle with the elbow here you don’t want to be for so far forward that our elbows are pointing back like this for so far back that you can’t read press down through the richness the very important component of this pose is really pressing through the hands and obviously engaging your core as well and, if you can’t press down enough it won’t take too much weight into the head. And this can cause compression through the site of course we don’t want so coming down popping the head onto the mat walk your hands back until they are nice degree angle. And then you’re just going to maybe hang out here for a little bit and start to draw in through the belly engage through the core and press into your hands feel the shoulders engaged and try to take the weight out of your head you should feel like pressure on the head. But there should not be any pain, if you do feel any pain on the top of the head or through the neck please come out straight away. And this as may not be suitable for you so from there we’re then going to come into a downward-facing dog so coming into your downward dog I’m gonna go press into the hands engage to the core you’re just going to breathe here those are three to five breaths herb along is comfortable and again that may be where you’re staying today this is a pose it takes a while to cultivate. But it also takes a while to get used to the positioning on the head and through the hands so do have a go a few times for this and then, if you feel like moving on to the next step you can take it from there. So the next step after this is to come into down dog. And then just start to tap one knee to chest other knee. And then placing one knee up onto your upper arm on the other knee bring the turns together to touch I don’t think here in kind of a head down crow pose again for three to five breaths.
And then make your way back out. So, if you found that comfortable you then can start to move on to the next stage of the pose however this is much easier to balance in this pose then it is coming all the way up I don’t want anybody to kick up you want to use cooler strength to curl out a little ball to come all the way up. So you might want to practice just that for maybe a week or so. And when you feel confident then move on to the next step obviously you could be practicing this always with a wall in front of you I’ve not got the wall here or just imagine that my wall is here and, if I did fall forwards the balloon would catch me and stop me from falling over in any way good the next step I find it nice to actually roll over my mat a little bit just to give you off the head a little bit of extra padding you’re gonna take your hands down onto the mat again come up into that half propos. And then you’re gonna start to throw the knees into the tummy. And come up into the ball you’re gonna work here. And just try and hold again for free five breaths. And then making your way slowly back down so before even attempting to roll up into the full thing really want to feel confident in that position and to be confident that position you’re pressing firmly through your hands and really engaging through the belly finally, if you want to come all the way up we’re going to do the exact same thing again coming into your tripod. And then draw the knees in slowly cooling yourself up then coming out the same way curling yourself all the way back down when you’re up there at first you might just be coming up coming down straight away you might try and stay there for three to five breaths and hopefully eventually maybe 15 breaths thank you very much for trying tripod headstand with me today I hope that you found the instructions is clear and useful but, if you do have any questions please don’t hesitate there are two below, if you’d like to subscribe you can do so both thank you very much. And then Mustaine.