
Welcome to their own yoga everyone today we’ll work on pincha mayur Asana the feathered peacock pose it’s an arm balance and an inversion. So It requires quite a bit of balance and strength. So you can always use a wall or better yet use a teacher and, if it you need to work on just building the strength stay with them dolphin pose which you’ll see later on. So we’ll go right ahead. And we’ll start with the foundations it’s really important to understand how the arms are and. So let’s understand the upper body so sit in a comfortable position lift the arms and try to bring the elbows to in to shoulder with hands and height shoulder width and height and as you can see I was really moving it in.
How to Do the Forearm Balance Ashtanga Pinchamayur Asana Photo Gallery

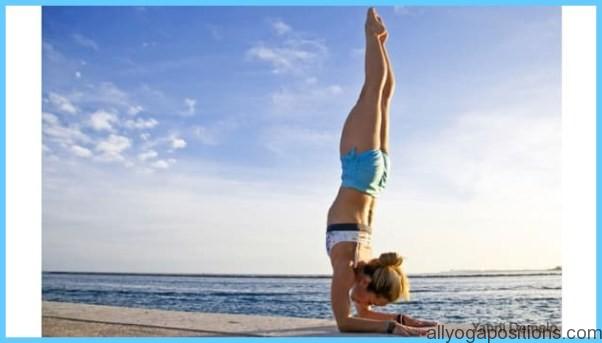
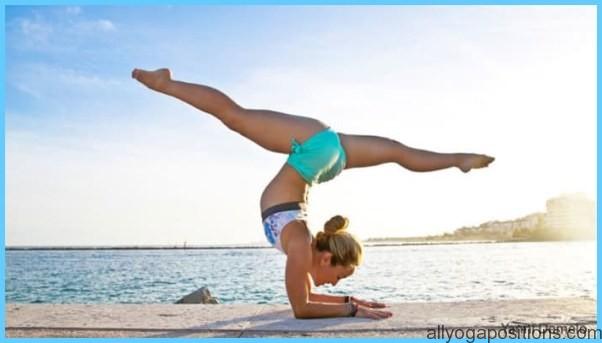


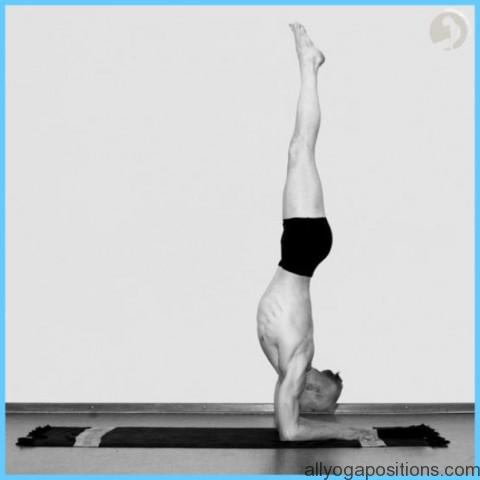

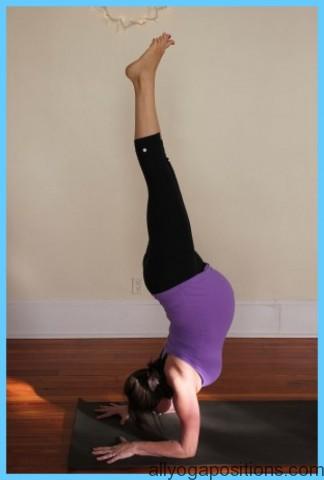
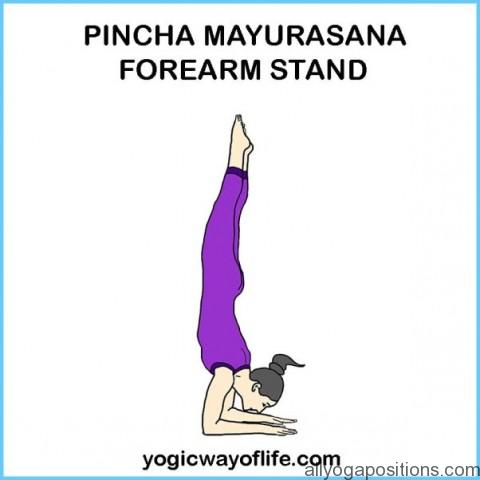

And I’m pressing it. So I’m bringing it in and pressing it forward as, if I’m pressing into the ground right this activates the chest. And the back really strong. And this is the foundation for the post. So you can see it from the back even a little better as I’m bringing the elbows. And you can see how much the muscles of the back are engaged right. So It’s really bringing them in. And then pressing them while keeping them at shoulder height so you’ll need to try and remember to do the same thing while we’re down in dolphin or later on picking up into the pincha mayur Asana I’m placing the arms in the exact same way I did in the air elbows underneath the shoulders wrists and line with the elbows, if you need to use a block between the hands in order to keep the hands from sliding in please do so as well as putting a strap around your upper arms elbow area in order to maintain the elbows under the shoulders so they won’t slide out alright so what we’re doing now is the dolphin pose. And this is a great place to stay here practice this three times ten breaths each it won’t be easy. But I would practice this until that gets easy enough and only then work on trying to do the pinch of my rosanna for the pinch of my rosanna we’re walking the feet trying to shift the hip as much as possible over the elbows as you can see this is another place to just stay and create strength here once you have the hips as far forward as you can lift one leg. And then you can try many times small ops or eventually try to do a full hop with when they’re coming up. And the other leg following the elbows are pressing strong into the ground you can see the belly is sucking in I’m using my bundles really strong keeping space between the shoulder blades legs are active right. And then to come down I’m almost doing the splits I took one leg over to one side.
And then the other leg came down. So that made the lower ring a lot slower once you do come down make sure you take some child’s pose and rest head is touching the ground that helps ground us I’m going to show it again. And I’m going to show it this time in a slow motion the coming up just. So we get a little better feel of this so again setting elbows wrists shoulders all in the same line walking the feet as far forward as possible really you can see my even my shoulders are moving a little bit hips are coming over the shoulders. And then there’s the kick their leg went just a bit over. And the other leg powerful came up to meet the first leg hands elbows especially really pressing into the ground legs active billion. And the gays this is very important my head is a little bit forward it’s kind of between the arms between the hands that makes it a little easier to balance there is a different pose where their gazes back. And the head is down. But that’s just a lot harder so remember Child’s Pose when you come down to rest. And the secret to doing this post is just doing it over and over again and it’ll come thank you all so much for practicing this one of my favorite poses let me know what you think let me know how it goes let me know what else you want to see take it easy and I’ll see y’all soon namaste ciao.